Home › Forum › Technical Help › Forum Help & Info › Website Builders / Image Works › Avatars 101 intermediate
- This topic has 4 replies, 2 voices, and was last updated 19 years, 3 months ago by
map6382.
-
AuthorPosts
-
-
December 17, 2003 at 01:15 #7797
Graham – Admin
KeymasterAvatars 101 – editing
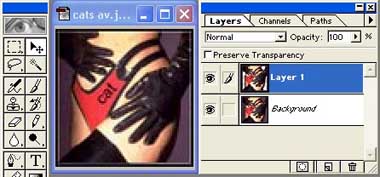
In PhotoShop (Paint Shop Pro is similar) open your 80 x 80 avatar. We will use Cats avatar for this example.

Select All> Copy> Add a new layer> Paste. You should now have 1 background and 1 layer on the layers palette/toolbar.

-
December 17, 2003 at 01:57 #11429
Graham – Admin
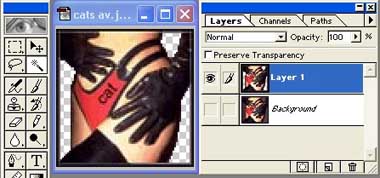
KeymasterTurn off visibilty of the background layer (click the eye)
Click the top layer on the toolbar to be sure you are working on it. Select either the magic wand, lasso or crop tool use it to select parts of the purpleish background colour and cut or delete. Repeat untill you get this.

-
December 17, 2003 at 02:22 #11430
Graham – Admin
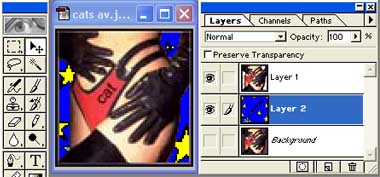
KeymasterNow open the new background image you wish to use it should be at least 80 x 80. Select all> Copy. Click on the cats_avatar window and click on the layers pallet, background layer to work on and show it. Now Paste. You’ll get a new “layer 2”. Click the Move tool and position your new background (can use keyboard arrows)

Goto File> Save a copy. Enter filename> Save as jpeg, jpg> click OK. A “JPEG Options” dialog box will appear as we’re saving for the internet a Quality of 2 is sufficent. And you’re done. YAY!.

-
December 18, 2003 at 03:39 #11431
Graham – Admin
KeymasterNB: Saving with PhotoShop 7
File> Save for the web> Settings> JPEG from the drop-down menu. Go to the drop-down menu with “JPEG High” displayed. “Medium” is a good setting to choose. Use “Quality” setting. to save the JPEG as a percentage of the original image’s quality. For example, 50% would be half the quality of the original image. When you are ready, click “Save” and save the image by giving it a file name.
-
November 16, 2005 at 11:36 #11432
map6382
MemberI got loads more to say about that, but I gotta run – Later!
-
-
AuthorPosts
- You must be logged in to reply to this topic.
Recent Comments